Print
In-App Billing for Java
Implementation
Quick Steps Bazaar In-App Billing Easy Guide
The objective of this tutorial is to explain the least steps required to implement Bazaar in-app billing (IAB) in your Android app. If you want to do more complicated tasks and know more about in-app billing process, you can read other provided documents.
1: Example Android App for In-app Billing
You can use TrivialDrive example app, which is made by Google, to understand the basics of in-app billing and to copy some util files from it into Eclipse (see next step).
In order to make this example applicable for Bazaar, we changed 2 lines of this example. You can see TrivialDrive's source code here or download it here. Also you can view our 2 lines changes in this commit.
2: Adding the IInAppBillingService.aidl and Util Files to the Project
Add IInAppBillingService.aidl file and util folder from the TrivialDrive example to your project.
Note: You might need to change package name of files inside util package based on their new location.
Migrating from Google Play: If you have already implemented Google Play in-app billing in your app, instead of this step, you can just edit IabHelper.java class as you can see in this commit.
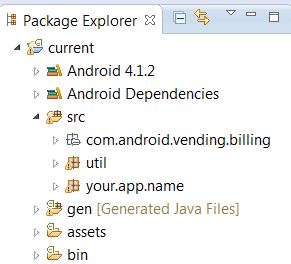
After completing this step, your folder structure in Eclipse should look like this:
3: Adding Bazaar Billing Permission to the Manifest File
In order to support in-app billing in your Android app, a new permission line must be added to the project’s AndroidManifest.xml file. Add the billing permission as follows to AndroidManifest.xml file:
<uses-permission android:name="com.farsitel.bazaar.permission.PAY_THROUGH_BAZAAR"></uses-permission>
4: Obtaining the Public Key (RSA Key) for the Application
Go to CafeBazaar's developers' panel. Upload your apk, but don’t submit app review request.
Go to Dealer Apps page. By clicking on the RSA Key in the Actions tab, Base64-encoded RSA public key for the application will be shown. Save it for step 7.
5: Products
In developers' panel under the Applications tab, click on the Enter button related to your app. Go to Products/Services page. Add new product with unique Sku. Remember this Sku for step 6.
6: Variables
Before calling onCreate method of seller activity (activity which does in-app billing) add below lines and fill them with your app specific values.
// Debug tag, for logging
static final String TAG = "";

// SKUs for our products: the premium upgrade (non-consumable)
static final String PRODUCT_SKU = "";

// (arbitrary) request code for the purchase flow
static final int RC_REQUEST = ;

// The helper object
IabHelper mHelper;
7: Inside onCreate Method
In the onCreate of your seller activity, add the following lines:
String base64EncodedPublicKey = "";
// You can find it in your Bazaar console, in the Dealers section.
// It is recommended to add more security than just pasting it in your source code;
mHelper = new IabHelper(this, base64EncodedPublicKey);

Log.d(TAG, "Starting setup.");
mHelper.startSetup(new IabHelper.OnIabSetupFinishedListener() {
    public void onIabSetupFinished(IabResult result) {
        Log.d(TAG, "Setup finished.");

        if (!result.isSuccess()) {
            // Oh noes, there was a problem.
            Log.d(TAG, "Problem setting up In-app Billing: " + result);
        }
        // Hooray, IAB is fully set up!
        mHelper.queryInventoryAsync(mGotInventoryListener);
    }
});
8: Listeners
Codes inside util handle the common tasks of in-app billing for all apps. You as a developer need to have your app specific listeners to handle different events related to in-app billing.
Below is an example implementation for handling Bazaar's response to not consumed purchased products of user and also for handling finished purchase event.
IabHelper.QueryInventoryFinishedListener mGotInventoryListener = new IabHelper.QueryInventoryFinishedListener() {
    public void onQueryInventoryFinished(IabResult result, Inventory inventory) {
        Log.d(TAG, "Query inventory finished.");
        if (result.isFailure()) {
            Log.d(TAG, "Failed to query inventory: " + result);
            return;
        }
        else {
            Log.d(TAG, "Query inventory was successful.");
            // does the user have the premium upgrade?
            mIsPremium = inventory.hasPurchase(SKU_PREMIUM);

            // update UI accordingly

            Log.d(TAG, "User is " + (mIsPremium ? "PREMIUM" : "NOT PREMIUM"));
        }

        Log.d(TAG, "Initial inventory query finished; enabling main UI.");
    }
};

IabHelper.OnIabPurchaseFinishedListener mPurchaseFinishedListener = new IabHelper.OnIabPurchaseFinishedListener() {
    public void onIabPurchaseFinished(IabResult result, Purchase purchase) {
        if (result.isFailure()) {
            Log.d(TAG, "Error purchasing: " + result);
            return;
        }
        else if (purchase.getSku().equals(SKU_PREMIUM)) {
            // give user access to premium content and update the UI
        }
    }
};

@Override
protected void onActivityResult(int requestCode, int resultCode, Intent data) {
    super.onActivityResult(requestCode, resultCode, data);

    Log.d(TAG, "onActivityResult(" + requestCode + "," + resultCode + "," + data);

    // Pass on the activity result to the helper for handling
    if (!mHelper.handleActivityResult(requestCode, resultCode, data)) {
        super.onActivityResult(requestCode, resultCode, data);
    } else {
        Log.d(TAG, "onActivityResult handled by IABUtil.");
    }
}
9: Purchasing Product
Below code will direct user to Bazaar's purchase dialog. After finishing purchase flow you will be informed by mPurchaseFinishedListener listener.
mHelper.launchPurchaseFlow(this, PRODUCT_SKU, RC_REQUEST, mPurchaseFinishedListener, "payload-string");
10: onDestroy
Unbind the service in onDestroy:
@Override
public void onDestroy() {
    super.onDestroy();
    if (mHelper != null) mHelper.dispose();
    mHelper = null;
}
You’re done!
In-App Billing Implementation Using Payment API
In-app Billing on Bazaar provides a straightforward, simple interface for sending In-app Billing requests and managing In-app Billing transactions using Bazaar. The information below covers the basics of how to make calls from your application to the In-app Billing service using the Version 3 API.Note: To see a complete implementation and learn how to test your application, see the TrivalDrive. This Sample provides a complete sample In-app B illing application, including convenience classes to handle key tasks related to setting up your connection, sending billing requests and processing responses from Bazaar, and managing background threading so that you can make In-app Billing calls from your main activity.
Before you start, be sure that you read the In-app Billing Overview to familiarize yourself with concepts that will make it easier for you to implement In-app Billing.
Adding the AIDL file to your project
The TrivialDrive sample application contains an Android Interface Definition Language (AIDL) file which defines the interface to Bazaar's In-app Billing service. When you add this file to your project, the Android build environment creates an interface file (IIAppBillingService.java). You can then use this interface to make billing requests by invoking IPC method calls.
To add the In-app Billing Version 3 library to your project:
- Copy the
IInAppBillingService.aidlfile to your Android project.- If you are using Eclipse: Import the
IInAppBillingService.aidlfile into your /srcdirectory. Eclipse automatically generates the interface file when you build your project. - If you are developing in a non-Eclipse environment: Create the following directory /
src/com/android/vending/billingand copy theIInAppBillingService.aidlfile into this directory. Put the AIDL file into your project and use the Ant tool to build your project so that theIInAppBillingService.javafile gets generated.
- If you are using Eclipse: Import the
- Build your application. You should see a generated file named
IInAppBillingService.javain the/gendirectory of your project.
Updating Your Application's Manifest
In-app billing relies on the Bazaar application, which handles all communication between your application and the Bazaar server. To use the Bazaar application, your application must request the proper permission. You can do this by adding the com.farsitel.bazaar.permission.PAY_THROUGH_BAZAAR permission to your AndroidManifest.xml file. If your application does not declare the In-app Billing permission, but attempts to send billing requests, Bazaar will refuse the requests and respond with an error.
To give your app the necessary permission, add this line in your Android.xml manifest file:
<uses-permission android:name="com.farsitel.bazaar.permission.PAY_THROUGH_BAZAAR" />
Creating a ServiceConnection
Your application must have a ServiceConnection to facilitate messaging between your application and Bazaar. At a minimum, your application must do the following:
- Bind to
IInAppBillingService. - Send billing requests (as IPC method calls) to the Bazaar application.
- Handle the synchronous response messages that are returned with each billing request.
Binding to IInAppBillingService
To establish a connection with the In-app Billing service on Bazaar, implement a ServiceConnection to bind your activity to IInAppBillingService. Override the onServiceDisconnected and onServiceConnected methods to get a reference to the IInAppBillingService instance after a connection has been established.
IInAppBillingService mService;

ServiceConnection mServiceConn = new ServiceConnection() {
   @Override
   public void onServiceDisconnected(ComponentName name) {
       mService = null;
   }

   @Override
   public void onServiceConnected(ComponentName name,
      IBinder service) {
       mService = IInAppBillingService.Stub.asInterface(service);
   }
};
In your activity’s onCreate method, perform the binding by calling the bindService method. Pass the method an Intent that references the In-app Billing service and an instance of the ServiceConnection that you created.
@Override
public void onCreate(Bundle savedInstanceState) {
    super.onCreate(savedInstanceState);
    setContentView(R.layout.activity_main);
    bindService(new
        Intent("ir.cafebazaar.pardakht.InAppBillingService.BIND"),
                mServiceConn, Context.BIND_AUTO_CREATE);
You can now use the mService reference to communicate with the Bazaar service.Important: Remember to unbind from the In-app Billing service when you are done with your Activity. If you don’t unbind, the open service connection could cause your device’s performance to degrade. This example shows how to perform the unbind operation on a service connection to In-app Billing called mServiceConn by overriding the activity’s onDestroy method.
@Override
public void onDestroy() {
    super.onDestroy();
    if (mServiceConn != null) {
        unbindService(mServiceConn);
    }
}
For a complete implementation of a service connection that binds to the IInAppBillingService, see the TrivalDrive sample.
Making In-app Billing Requests
Once your application is connected to Bazaar, you can initiate purchase requests for in-app products. Bazaar provides a checkout interface for users to enter their payment method, so your application does not need to handle payment transactions directly. When an item is purchased, Bazaar recognizes that the user has ownership of that item and prevents the user from purchasing another item with the same product ID until it is consumed. You can control how the item is consumed in your application, and notify Bazaar to make the item available for purchase again. You can also query Bazaar to quickly retrieve the list of purchases that were made by the user. This is useful, for example, when you want to restore the user's purchases when your user launches your app.
Querying for Items Available for Purchase
In your application, you can query the item details from Bazaar using the In-app Billing Version 3 API. To pass a request to the In-app Billing service, first create a Bundle that contains a String ArrayList of product IDs with key "ITEM_ID_LIST", where each string is a product ID for an purchasable item.
ArrayList skuList = new ArrayList();
skuList.add("premiumUpgrade");
skuList.add("gas");
Bundle querySkus = new Bundle();
querySkus.putStringArrayList(“ITEM_ID_LIST”, skuList);
To retrieve this information from Bazaar, call the getSkuDetails method on the In-app Billing Version 3 API, and pass the method the In-app Billing API version (“3”), the package name of your calling app, the purchase type (“inapp”), and the Bundle that you created.
Bundle skuDetails = mService.getSkuDetails(3,
   getPackageName(), "inapp", querySkus);
If the request is successful, the returned Bundle has a response code of BILLING_RESPONSE_RESULT_OK (0).Warning: Do not call the getSkuDetails method on the main thread. Calling this method triggers a network request which could block your main thread. Instead, create a separate thread and call the getSkuDetails method from inside that thread.
To see all the possible response codes from Bazaar, see In-app Billing Reference.
The query results are stored in a String ArrayList with key DETAILS_LIST. The purchase information is stored in the String in JSON format. To see the types of product detail information that are returned, see In-app Billing Reference.
In this example, you are retrieving the prices for your in-app items from the skuDetails Bundle returned from the previous code snippet.
int response = skuDetails.getInt("RESPONSE_CODE");
if (response == 0) {
   ArrayList responseList
      = skuDetails.getStringArrayList("DETAILS_LIST");

   for (String thisResponse : responseList) {
      JSONObject object = new JSONObject(thisResponse);
      String sku = object.getString("productId");
      String price = object.getString("price");
      if (sku.equals("premiumUpgrade")) mPremiumUpgradePrice = price;
      else if (sku.equals("gas")) mGasPrice = price;
   }
}
Purchasing an Item
To start a purchase request from your app, call the getBuyIntent method on the In-app Billing service. Pass in to the method the In-app Billing API version (“3”), the package name of your calling app, the product ID for the item to purchase, the purchase type (“inapp”), and a developerPayload String. The developerPayload String is used to specify any additional arguments that you want Bazaar to send back along with the purchase information.
Bundle buyIntentBundle = mService.getBuyIntent(3, getPackageName(),
   sku, "inapp", "bGoa+V7g/yqDXvKRqq+JTFn4uQZbPiQJo4pf9RzJ");
If the request is successful, the returned Bundle has a response code of BILLING_RESPONSE_RESULT_OK (0) and a PendingIntent that you can use to start the purchase flow. To see all the possible response codes from Bazaar, see In-app Billing Reference. Next, extract a PendingIntent from the response Bundle with key BUY_INTENT.
PendingIntent pendingIntent = buyIntentBundle.getParcelable("BUY_INTENT");To complete the purchase transaction, call the startIntentSenderForResult method and use the PendingIntent that you created. In this example, you are using an arbitrary value of 1001 for the request code.
startIntentSenderForResult(pendingIntent.getIntentSender(),
   1001, new Intent(), Integer.valueOf(0), Integer.valueOf(0),
   Integer.valueOf(0));
Bazaars sends a response to your PendingIntent to the onActivityResult method of your application. The onActivityResult method will have a result code of Activity.RESULT_OK (1) or Activity.RESULT_CANCELED (0). To see the types of order information that is returned in the response Intent, see In-app Billing Reference.
The purchase data for the order is a String in JSON format that is mapped to the INAPP_PURCHASE_DATA key in the response Intent, for example:
'{
   "orderId":"12999763169054705758.1371079406387615",
   "packageName":"com.example.app",
   "productId":"exampleSku",
   "purchaseTime":1345678900000,
   "purchaseState":0,
   "developerPayload":"bGoa+V7g/yqDXvKRqq+JTFn4uQZbPiQJo4pf9RzJ",
   "purchaseToken":"rojeslcdyyiapnqcynkjyyjh"
 }'
Continuing from the previous example, you get the response code, purchase data, and signature from the response Intent.
@Override
protected void onActivityResult(int requestCode, int resultCode, Intent data) {
   if (requestCode == 1001) {
      int responseCode = data.getIntExtra("RESPONSE_CODE", 0);
      String purchaseData = data.getStringExtra("INAPP_PURCHASE_DATA");
      String dataSignature = data.getStringExtra("INAPP_DATA_SIGNATURE");

      if (resultCode == RESULT_OK) {
         try {
            JSONObject jo = new JSONObject(purchaseData);
            String sku = jo.getString("productId");
            alert("You have bought the " + sku + ". Excellent choice,
               adventurer!");
          }
          catch (JSONException e) {
             alert("Failed to parse purchase data.");
             e.printStackTrace();
          }
      }
   }
}
Security Recommendation: When you send a purchase request, create a String token that uniquely identifies this purchase request and include this token in the developerPayload.You can use a randomly generated string as the token. When you receive the purchase response from Bazaar, make sure to check the returned data signature, the orderId, and the developerPayload String. For added security, you should perform the checking on your own secure server. Make sure to verify that the orderId is a unique value that you have not previously processed, and the developerPayload String matches the token that you sent previously with the purchase request.
Notice:
Sometimes, after your app leads user to Pardakht system, android closes your app’s top Activity, due to memory reasons, and everything that you changed and saved in your Activity, disappears. So, this prevents your app from saving the data which Pardakht sends to your app about the payment process. This happens frequently on low-end devices, and also sometimes on high-end devices too. In order to prevent this fact, implement onSaveInstanceState method of your activity which sends user to Pardakht system, and save any variables and values you want to have after activity being recreated, in the Bundle object given as an argument. After android closes your app’s activity and recreates that, onCreate method will have that Bundle object as its argument. So you can get any values you’ve set before. For more information, visit here.
Querying for Purchased Items
To retrieve information about purchases made by a user from your app, call the getPurchases method on the In-app Billing Version 3 service. Pass in to the method the In-app Billing API version (“3”), the package name of your calling app, and the purchase type (“inapp”).
Bundle ownedItems = mService.getPurchases(3, getPackageName(), "inapp", null);The Bazaar service returns only the purchases made by the user account that is currently logged in to the device. If the request is successful, the returned Bundle has a response code of 0. The response Bundle also contains a list of the product IDs, a list of the order details for each purchase, and the signatures for each purchase.
To improve performance, the In-app Billing service returns only up to 100 products that are owned by the user when getPurchase is first called. If the user owns a large number of products, Bazaar includes a String token mapped to the key INAPP_CONTINUATION_TOKEN in the response Bundle to indicate that more products can be retrieved. Your application can then make a subsequent getPurchases call, and pass in this token as an argument. Bazaar continues to return a continuation token in the response Bundle until all products that are owned by the user has been sent to your app.
For more information about the data returned by getPurchases, see In-app Billing Reference. The following example shows how you can retrieve this data from the response.
int response = ownedItems.getInt("RESPONSE_CODE");
if (response == 0) {
   ArrayList ownedSkus =
      ownedItems.getStringArrayList("INAPP_PURCHASE_ITEM_LIST");
   ArrayList purchaseDataList =
      ownedItems.getStringArrayList("INAPP_PURCHASE_DATA_LIST");
   ArrayList signatureList =
      ownedItems.getStringArrayList("INAPP_DATA_SIGNATURE");
   String continuationToken =
      ownedItems.getString("INAPP_CONTINUATION_TOKEN");

   for (int i = 0; i < purchaseDataList.size(); ++i) {
      String purchaseData = purchaseDataList.get(i);
      String signature = signatureList.get(i);
      String sku = ownedSkus.get(i);

      // do something with this purchase information
      // e.g. display the updated list of products owned by user
   }

   // if continuationToken != null, call getPurchases again
   // and pass in the token to retrieve more items
}
Consuming a Purchase
You can use the In-app Billing Version 3 API to track the ownership of purchased items in Bazaar. Once an item is purchased, it is considered to be "owned" and cannot be purchased from Bazaar. You must send a consumption request for the item before Bazaar makes it available for purchase again. All managed in-app products are consumable. How you use the consumption mechanism in your app is up to you. Typically, you would implement consumption for products with temporary benefits that users may want to purchase multiple times (for example, in-game currency or equipment). You would typically not want to implement consumption for products that are purchased once and provide a permanent effect (for example, a premium upgrade).
To record a purchase consumption, send the consumePurchase method to the In-app Billing service and pass in the purchaseToken String value that identifies the purchase to be removed. The purchaseToken is part of the data returned in the INAPP_PURCHASE_DATA String by the Bazaar service following a successful purchase request. In this example, you are recording the consumption of a product that is identified with the purchaseToken in the token variable.
int response = mService.consumePurchase(3, getPackageName(), token);Warning: Do not call the consumePurchase method on the main thread. Calling this method triggers a network request which could block your main thread. Instead, create a separate thread and call the consumePurchase method from inside that thread.
It's your responsibility to control and track how the in-app product is provisioned to the user. For example, if the user purchased in-game currency, you should update the player's inventory with the amount of currency purchased.Security Recommendation: You must send a consumption request before provisioning the benefit of the consumable in-app purchase to the user. Make sure that you have received a successful consumption response from Bazaar before you provision the item.
Implementing Subscriptions
Launching a purchase flow for a subscription is similar to launching the purchase flow for a product, with the exception that the product type must be set to subs. The purchase result is delivered to your Activity's onActivityResult, exactly as in the case of in-app products.
Bundle bundle = mService.getBuyIntent(3, "com.example.myapp",
   MY_SKU, "subs", developerPayload);

PendingIntent pendingIntent = bundle.getParcelable(RESPONSE_BUY_INTENT);
if (bundle.getInt(RESPONSE_CODE) == BILLING_RESPONSE_RESULT_OK) {
   // Result will be delivered through onActivityResult().
   startIntentSenderForResult(pendingIntent, RC_BUY, new Intent(),
       Integer.valueOf(0), Integer.valueOf(0), Integer.valueOf(0));
}
To query for active subscriptions, use the getPurchases method, again with the product type parameter set to subs.
Bundle activeSubs = mService.getPurchases(3, "com.example.myapp",
                   "subs", continueToken);
The call returns a Bundle with all the active subscriptions owned by the user. Once a subscription expires without renewal, it will no longer appear in the returned Bundle .
Was this content helpful?
Write your comment here...
If you have any comment on this content or any idea to make it better, use this form to send us your comment.
Publish Date: 1400-03-29 07:26
Latest Update: 1400-04-11 12:12